
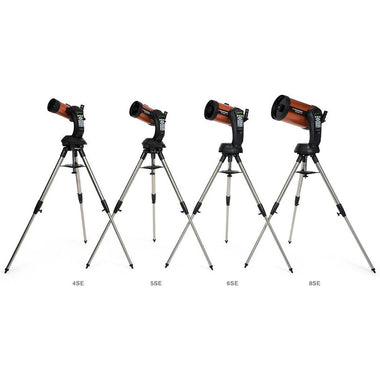
Telescopes have seen some incredible improvements. Not only can you have a mini observatory in your backyard, you can now find celestial objects that may have eluded you in the past thanks to computerized technology. But before you can start observing, you need to set up your NexStar correctly. Here’s how:
1. Unpack your telescope and ensure you have all the parts.
Very rarely will a telescope come with missing pieces, but it pays to be better safe than sorry. Pull out your manual and ensure all the parts that are supposed to be with your telescope are included. These parts should include:
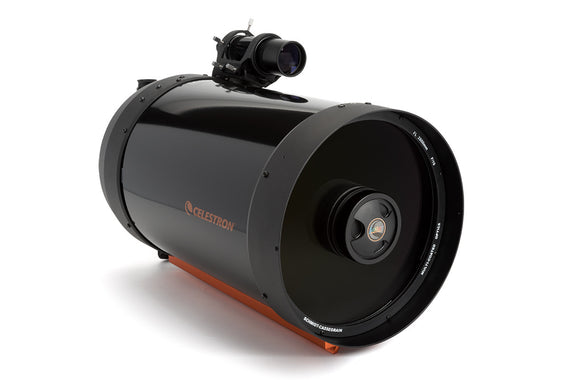
2. Attach the main three pieces: the optical tube, the fork arm, and the tripod.
First, open up the tripod until the brace in the center is extended fully. Add your accessory tray to the center brace by setting it on top (you don’t have to add this right now, but you might as well). Rotate the tray until the locking braces snap into place. Next, snap on the hand controller holder on any of the tripod legs.
Now add the forking arm. Set the arm in the mounting platform on the top of the tripod. Thread the coupling screw located underneath the mounting platform into the hole in the bottom of the forking arm. Twist to tighten.
Lastly, attach the optical tube. The tube has a dovetail mounting bar on the side that attaches to the fork arm. Loosen the tightening knob on the tube clamp, slide the dovetail mounting bar into the fork arm clamp, then tighten the knob on the tube clamp.
3. Attach accessories.
The last pieces you’ll need to add before you can begin stargazing are the finderscope, eyepiece, and hand control. The finderscope goes on top of the optical tube near the eyepiece adapter. Slide the finderscope on the dovetail mounting platform, ensure the sight tube is facing the front of your telescope, and tighten the screw.
To attach the hand control, plug the end of the connector cord attached to the hand control into the Hand Control Port on the arm of your telescope. Slip the hand control into the holder you snapped onto your tripod in step 2.
Last but not least, pick an eyepiece to start with, slide it into the eyepiece adapter, tighten the screws, and you’re done! You’re now ready to align your telescope and start viewing!
1. Unpack your telescope and ensure you have all the parts.
Very rarely will a telescope come with missing pieces, but it pays to be better safe than sorry. Pull out your manual and ensure all the parts that are supposed to be with your telescope are included. These parts should include:
- Optical Tube
- Fork Arm
- Tripod
- 25mm and 9mm eyepieces
- Star Pointer Finderscope and Mounting Bracket
- Accessory Tray
- The Sky™ Level 1 Astronomy Software
- NSOL Telescope Control Software
- NexStar Hand Control w/ Object Database
2. Attach the main three pieces: the optical tube, the fork arm, and the tripod.
First, open up the tripod until the brace in the center is extended fully. Add your accessory tray to the center brace by setting it on top (you don’t have to add this right now, but you might as well). Rotate the tray until the locking braces snap into place. Next, snap on the hand controller holder on any of the tripod legs.
Now add the forking arm. Set the arm in the mounting platform on the top of the tripod. Thread the coupling screw located underneath the mounting platform into the hole in the bottom of the forking arm. Twist to tighten.
Lastly, attach the optical tube. The tube has a dovetail mounting bar on the side that attaches to the fork arm. Loosen the tightening knob on the tube clamp, slide the dovetail mounting bar into the fork arm clamp, then tighten the knob on the tube clamp.
3. Attach accessories.
The last pieces you’ll need to add before you can begin stargazing are the finderscope, eyepiece, and hand control. The finderscope goes on top of the optical tube near the eyepiece adapter. Slide the finderscope on the dovetail mounting platform, ensure the sight tube is facing the front of your telescope, and tighten the screw.
To attach the hand control, plug the end of the connector cord attached to the hand control into the Hand Control Port on the arm of your telescope. Slip the hand control into the holder you snapped onto your tripod in step 2.
Last but not least, pick an eyepiece to start with, slide it into the eyepiece adapter, tighten the screws, and you’re done! You’re now ready to align your telescope and start viewing!